If you’ve recently purchased a home or are moving into a new rental, one of the first things you may want to accomplish is to paint.
A new paint job can dramatically transform your new home, taking less time and costing less than other remodeling projects you may be considering. Painting both the interior and exterior also can be a wise investment. The fresh paint will provide a protective barrier for your walls and home exterior, lasting at least 15 years if you use superior paint and take care to apply it properly.
Painting Your Home Exterior
Before you begin to paint, the exterior of your home needs to be thoroughly cleaned to remove all the caked-on dirt, debris and any chipped paint that will keep your new paint from sealing properly. A pressure washer is one of the best ways to wash the exterior surfaces, but you do need to use caution so you don’t chip your wood or push water up behind your siding and trim. Your wood siding needs at least a day or two of drying to be ready to be painted.
You’ll then need to scrape and sand any peeling or bubbling paint. It can be a painstaking process to scrape old paint off by hand, but it can be the best way to remove the old layers of paint. It’s a good idea to use a respirator when scraping paint.
When the peeling or chipped paint has been removed, you’ll want to use sand paper to smooth out any rough patches. Renting a small hand-held sander can make this process go quickly. Once you’ve finished sanding, you’ll need to patch holes, cracks or dents.
You are now ready to paint. Use an acrylic primer on most exterior surfaces, except cedar or redwood, which require oil-based coatings. If there are any exposed nails, spray them with a metal primer to prevent rust from seeping through the paint. When your primer is dry, caulk the small joints in the trim and siding.
Now it is time to paint. It’s faster to use a paint sprayer like the professionals do, and they can often be rented. Be careful you don’t accidentally spray paint elsewhere, like on your windows or your car parked in the driveway. You may want to use brushes around doorways and windows. Using tarps and ladders, start from the top of the home and work your way down. The professionals recommend using two coats of paint.
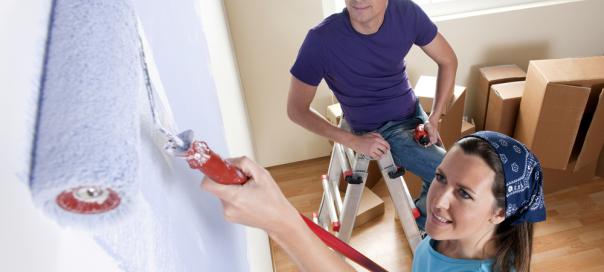
Painting Your Home Interior
Preparation is the key to making painting easier inside your home. Plan on spending an entire day preparing the walls for painting. You’ll need to sand away any old paint drips and scuffs, patch any holes, caulk any gaps and clean away dust or grease so the walls are ready to be painted. Unscrew, remove and clean all the switch plates and electrical outlet covers.
You’ll need to use painter’s tape to tape every edge near the walls to protect them from misplaced brush strokes. You can also use angled brushes to create straight paint edges if you feel more confident in your painting abilities. If you learn how to properly create an edge with an angled brush, your corners and ceilings will look clean and sharp.
Many professionals will use a primer, which creates an even base that allows the walls to take paint. You can have your paint store tint the primer so it complements your paint color, saving you at least one coat of paint later.
As you’re painting your walls, whether you are doing it by hand or using a paint roller, keep moving. Level out the areas where the paint went on heavy, and try to catch drips before they become permanent. It can help to carry a rag to wipe up any mistakes. You’ll want to have canvas tarps below you, to catch any drips that could cause damage to your flooring.
As with any new skill, once you start painting your home, you’ll discover shortcuts and efficiencies that, in the end, will make you feel like an old pro. You’ll also be able to step back and take pride in the work that you accomplished that makes your new house suddenly feel like your home.